ADVERTISEMENT
Have you ever had one of those cold evenings when nothing but pure comfort food will do? That's when I reach for this beef pot pie recipe. There's something almost magical about breaking through that golden, flaky crust and watching the steam escape, revealing tender chunks of beef and colorful vegetables swimming in rich gravy. This isn't just dinner—it's a warm hug on a plate.
After countless Sunday afternoons experimenting in my kitchen (and yes, some notable failures!), I've finally nailed a recipe that delivers everything I want in a pot pie: meat that practically melts in your mouth, vegetables with just the right bite, and a crust that strikes that perfect balance between flaky and sturdy.
I created this version after trying dozens of recipes that left me wanting more. Now with over 260 glowing reviews and a 4.4-star rating, it's become the recipe my family begs for as soon as the temperatures drop.
Why You'll Love This Recipe
- Restaurant-quality results using simple techniques that won't intimidate even novice cooks
- Fork-tender beef thanks to a slow-simmer method that's practically foolproof
- Flexible prep options that fit your schedule (make components ahead or all at once)
- Complete meal in one dish that satisfies even your hungriest dinner guests
- Time-tested recipe that works consistently, every single time
Recipe Essentials
⏱️ Prep Time: 30 minutes
⏱️ Cook Time: 3 hours (mostly hands-off—perfect for catching up on your favorite show)
⏱️ Total Time: 3 hours 30 minutes
🍽️ Servings: 6 generous portions
💪 Difficulty: Moderate (but mainly because it takes time, not because it's complicated)
🥗 Dietary Notes: Contains gluten and dairy
🔧 Equipment Needed: Large skillet, medium saucepan, 9-inch pie plate, mixing bowls
Ingredients for Beef Pot Pie Recipe
Sirloin steak (1 pound, cubed): This becomes the star of your pot pie, transforming into those melt-in-your-mouth bites we all crave. On a budget? Chuck roast works beautifully too—it just needs that slow cooking to shine.
Salt and ground black pepper: The backbone of good flavor. I like kosher salt for its clean taste and freshly ground pepper for that extra pop of aroma.
Beef broth (14-ounce can): This creates the foundation for your gravy. I've found that low-sodium options give you better control over the final taste. When I'm feeling fancy, I'll splurge on beef bone broth for even deeper flavor.
Carrots (3 large, diced): These add natural sweetness and bright color. Try to cut them into even ½-inch pieces so they cook at the same rate—nothing worse than biting into an undercooked carrot!
Potatoes (3 medium, cubed): The heartiness factor! Yukon Golds are my go-to because they hold their shape while developing this amazing buttery quality. Aim for ½-inch cubes so they'll be perfectly tender.
Frozen green peas (1 cup, thawed): These little gems add a pop of color and sweet flavor. The best part? No pre-cooking needed—they'll warm through during baking and stay bright green.
Cornstarch (3 tablespoons): The secret to silky gravy! Always mix it with cold water first—I learned this the hard way after once creating a lumpy mess by adding it directly to hot liquid.
Water (⅓ cup): Used for both dissolving cornstarch and simmering the beef. Nothing fancy needed here, though I do use filtered water at home.
Refrigerated pie crusts (2, 9-inch): These create that irresistible flaky exterior. Store-bought crusts save tons of time, but when I'm trying to impress, homemade dough takes this pie to new heights. Let them sit out for about 15 minutes before using—they'll be much easier to work with.
How to Make Beef Pot Pie Recipe
- Prepare the beef. Heat a large skillet over medium-high heat. Season your beef cubes with salt and pepper—don't be shy here! Brown the meat in batches (I learned the hard way that overcrowding the pan just steams the meat). Each batch takes about 3-4 minutes to develop that rich brown exterior that equals flavor.
- Simmer until tender. Return all that browned meat to your skillet and add enough water to almost cover it (around 2 cups). Bring to a quick boil, then immediately dial it back to a gentle simmer. Cover partially and let it do its thing for 2-3 hours, checking occasionally. You'll know it's ready when you can easily break a piece apart with just your fork. This slow-cooking magic transforms even tough meat into something spectacular.
- Cook the vegetables. While your beef does its slow dance, pour beef broth into a medium saucepan and bring to a simmer. Add your diced carrots and potatoes, cooking for 15-20 minutes. You want them just shy of tender—they'll finish cooking in the oven. I test by poking with a knife; a little resistance in the center is perfect.
- Prepare the filling. Using a slotted spoon, transfer your beautifully tender beef to a large mixing bowl, keeping that precious cooking liquid in the skillet. I like to gently break up some of the larger pieces with two forks while leaving others intact for texture. Give it a taste and add more seasoning if needed.
- Drain the vegetables. Use your slotted spoon again to transfer the carrots and potatoes to the bowl with your beef, saving that flavorful broth. Toss in the thawed peas and gently mix everything together—I find hands work best for this job!
- Make the gravy. In a small bowl, whisk cornstarch and ⅓ cup cold water until smooth (no lumps allowed!). Slowly pour this mixture into your hot beef broth, whisking constantly. Bring to a gentle simmer, reduce heat, and cook for about 5 minutes, stirring frequently. You're looking for a consistency that coats the back of a spoon—rich but not gloopy.
- Preheat the oven. Set your oven to 350°F (175°C) and position a rack in the center.
- Assemble the pot pie. Let one pie crust warm up at room temperature for 15 minutes (this prevents cracking), then gently unroll and place it into your 9-inch pie plate. Press it in lightly without stretching. Spoon your meat and veggie mixture evenly into the crust.
- Add the gravy. Pour your gorgeous thickened gravy over the filling, watching as it seeps down through the layers. Sometimes I jiggle the pie plate slightly to help it distribute evenly.
- Top with the second crust. Unroll the second crust and drape it over your filling. Trim any excess dough, then seal and crimp the edges—get creative with your crimping style! Cut 4-5 small slits in the center to let steam escape (these also make for a beautiful presentation as the gravy bubbles up).
- Bake to golden perfection. Place your pie on a baking sheet (trust me on this—catching drips is way better than cleaning your oven) and bake for 25-30 minutes. You're looking for an evenly golden-brown crust and filling that's bubbling through those slits you cut.
- Rest before serving. This might be the hardest part—waiting! Let the pot pie rest for at least 5 minutes before cutting in. This crucial step allows the filling to set slightly, so you'll get neat slices instead of a runny mess.
Texture and Final Result
When you nail this recipe, each bite delivers a symphony of textures and flavors. The crust shatters slightly when your fork breaks through, releasing a beautiful wisp of steam. Inside, the beef is so tender you won't need a knife—it yields easily with just your fork. The vegetables maintain their character: carrots with a pleasant tenderness, potatoes holding their shape while being creamy inside, and peas that pop with fresh sweetness.
The gravy brings everything together, coating each morsel without being too soupy or thick. When you lift a forkful, notice how everything clings together perfectly. And that bottom crust? Still crisp rather than soggy—the true mark of pot pie success!
Expert Tips for Success
- Temperature matters: I once ruined a pie by working with ice-cold crust that cracked into pieces. Let refrigerated crusts warm slightly at room temperature for 15-20 minutes before unrolling.
- Browning is worth the time: Don't rush this step! Those caramelized bits on the meat create deep flavor compounds that make the difference between a good pot pie and an amazing one.
- Prevent soggy bottom crust: My secret weapon? Brush the bottom crust lightly with beaten egg white before adding filling. Or for guaranteed crispness, blind bake it for 10 minutes while you finish preparing the filling.
- Perfect gravy technique: Add your cornstarch slurry in a thin, steady stream while whisking constantly. Got lumps anyway? No worries—simply strain through a fine-mesh sieve.
- Visual cues for doneness: Rather than just watching the clock, I look for an evenly golden-brown crust with no pale spots, filling bubbling through the vents, and a firm feel when I gently shake the pie plate.
Storage & Make-Ahead
Refrigerator storage: We rarely have leftovers, but when we do, they keep beautifully in the fridge for up to 3 days when covered tightly. I've found the flavors actually deepen overnight, making day-two pot pie something to look forward to!
Freezer instructions: After a busy week of cooking for a family gathering, I discovered fully baked and cooled pot pies freeze amazingly well for up to 2 months. Wrap tightly in plastic followed by foil, and thaw overnight in the fridge before reheating.
Make-ahead strategy: When hosting dinner parties, I often prepare the filling up to 2 days ahead and store it in the refrigerator. Then I just assemble and bake right before serving. Pro tip: let the filling come to room temperature before assembling to ensure even baking.
Reheating method: The microwave works in a pinch, but for that fresh-baked texture, warm individual portions in a 325°F oven for 15-20 minutes. The crust stays crisp rather than turning soggy.
Variations & Customizations
Mushroom lover's version: My husband goes wild for this—add 8 ounces of sliced cremini mushrooms sautéed in butter until golden brown. They bring an earthy depth that makes the beef flavor even more pronounced.
French-inspired upgrade: Replace ¼ cup of the water for simmering with a dry red wine, and add a teaspoon of fresh thyme leaves. This subtle change creates a more sophisticated flavor that guests always notice but can't quite place.
Vegetable enhancements: When I'm cleaning out the fridge, I often add diced celery or sweet pearl onions to the filling. Both add their own lovely dimension without overwhelming the star ingredients.
Pastry variations: For dinner parties, I sometimes use puff pastry on top instead of pie crust—the dramatic height impresses everyone! For family gatherings, individual ramekins topped with pastry rounds let everyone enjoy their own personal pie.
Root vegetable medley: Last winter, I started substituting half the potatoes with parsnips and turnips. The slight sweetness and complexity they bring makes this comfort food feel even more special.
Serving Suggestions
This hearty pot pie stands proudly on its own, but for Sunday dinner or when company's coming, I like to add:
- A simple green salad with vinaigrette—the light, acidic notes cut through the richness of the pie
- Homemade cranberry sauce—the sweet-tart flavor creates a perfect contrast
- Roasted Brussels sprouts or steamed green beans—their simplicity complements rather than competes
- For casual gatherings, I've served smaller portions alongside other comfort foods like mac and cheese
My favorite presentation trick? Sprinkle the top crust with flaky sea salt just before serving—it adds both visual appeal and a pleasant textural contrast that makes people think you're a culinary genius.
The History Behind Beef Pot Pie
I've always found food history fascinating! Pot pies trace back to the Roman Empire, where pastry served as both cooking vessel and preservation method before refrigeration existed. By the 16th century, they had become staples across Europe, with the English particularly embracing meat pies in their cooking.
American pot pies evolved from these European roots, with beef versions becoming wildly popular during the 19th century as cattle ranching expanded across the American West. During the Great Depression, pot pies became a smart way to stretch scarce meat by combining it with more affordable vegetables. The 1950s brought frozen pot pies to supermarkets, making this once labor-intensive dish accessible to busy households.
Today's beef pot pie represents the perfect blend of practicality and comfort—a dish that makes good use of ingredients while delivering that soul-satisfying feeling we all crave when temperatures drop.
FAQs about Beef Pot Pie Recipe
What goes into beef pot pie?
A classic beef pot pie brings together tender chunks of beef (I like chuck, sirloin, or stew meat), vegetables like carrots, potatoes, and peas, all wrapped in a rich gravy and enclosed in flaky pastry. Most recipes season with basics like salt and pepper, sometimes adding herbs like thyme or rosemary. The beauty of pot pie is how adaptable it is—I've made versions with mushrooms, pearl onions, or celery depending on what's in my fridge. As long as you keep the foundation of meat, vegetables, gravy, and crust, you can play with the details!
How do you keep the bottom crust of a pot pie from getting soggy?
Ah, the dreaded soggy bottom! After several disappointing early attempts, I've found several tricks that work: First, make sure your filling isn't too wet—the gravy should coat ingredients without excess liquid pooling. Second, try blind-baking the bottom crust for 10-12 minutes before adding filling. Third, brush the raw bottom crust with beaten egg white, which creates a moisture barrier. Fourth, bake your pie on a lower oven rack or on a preheated baking sheet to direct heat to the bottom. Finally, let your filling cool a bit before assembly—hot filling starts cooking the bottom crust before it hits the oven, often making it soggy.
What is the best cut of meat for pot pie?
After trying practically every cut of beef, I've found chuck roast offers the perfect balance of flavor, fat, and texture. Those connective tissues break down during slow cooking, creating incredibly tender meat with rich taste. Sirloin is my second choice—it's leaner but still becomes wonderfully tender. For convenience, pre-packaged stew meat (usually chuck) works well too. The real secret isn't just the cut—it's giving it enough time to simmer slowly. I aim for 1-inch cubes that hold some substance after cooking rather than disappearing into the gravy.
What is the difference between a meat pie and a pot pie?
This confused me for years! The main difference comes down to structure and consistency. Traditional meat pies contain mostly meat with minimal gravy, completely enclosed in pastry (top and bottom crusts), and are firm enough to eat by hand. Pot pies, on the other hand, feature a saucier filling with plenty of vegetables and gravy, typically with just a top crust or sometimes both crusts. The name "pot pie" comes from the original cooking method—they were assembled and baked in pots rather than pie pans. Different regions blur these distinctions, though. When I visited the UK, what I call pot pies were often labeled simply as "savory pies."
Looking for more comfort food recipes? Try our Slow Cooker Beef Tips with Mushrooms for another hearty beef dinner that practically cooks itself!
This classic beef pot pie transforms simple ingredients into a dinner that will have everyone asking for seconds. The combination of tender beef, perfectly cooked vegetables, and flaky crust creates a meal that feels special, even on an ordinary Tuesday. What comfort food recipe is calling your name this season?
Print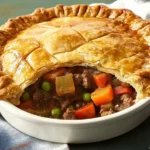
ADVERTISEMENT
The Ultimate Homemade Beef Pot Pie Recipe: Flaky, Tender & Comforting
- Total Time: 3 hours 30 minutes
- Yield: 6 servings 1x
- Diet: Kosher
Description
Experience comfort in every bite with this ultimate homemade beef pot pie. A golden, flaky crust encases tender chunks of beef and colorful vegetables, all enveloped in a rich and savory gravy.
Ingredients
- 1 pound sirloin steak, cubed
- Salt and ground black pepper
- 14-ounce can of beef broth
- 3 large carrots, diced
- 3 medium potatoes, cubed
- 1 cup frozen green peas, thawed
- 3 tablespoons cornstarch
- ⅓ cup water
- 2 refrigerated pie crusts, 9-inch
Instructions
- Prepare the beef by browning it in a large skillet over medium-high heat after seasoning with salt and pepper.
- Simmer the beef with enough water to almost cover it and cook until fork-tender.
- In a medium saucepan, simmer beef broth and cook diced carrots and potatoes until just shy of tender.
- Transfer beef to a mixing bowl and break into pieces, then add vegetables and peas.
- Make the gravy by whisking cornstarch with cold water and then incorporating it into hot beef broth.
- Preheat the oven to 350°F (175°C).
- Assemble the pot pie with one pie crust on the bottom, filling with beef and veggies, then pour gravy on top.
- Top with the second pie crust, seal, and crimp edges. Cut small slits for steam to escape.
- Bake for 25-30 minutes until the crust is golden brown.
- Let it rest for at least 5 minutes before serving.
Notes
- Temperature matters: Allow pie crusts to warm at room temperature before using to prevent cracking.
- Browning beef deeply enhances flavor.
- Brush egg white on the bottom crust to avoid sogginess.
- Steady whisking while adding cornstarch prevents lumps.
- Look for a golden-brown crust and bubbling filling for doneness.
- Prep Time: 30 minutes
- Cook Time: 3 hours
- Category: Main Course
- Method: Baking
- Cuisine: American
Nutrition
- Serving Size: 1 serving
- Calories: 500
- Sugar: 5g
- Sodium: 900mg
- Fat: 25g
- Saturated Fat: 10g
- Unsaturated Fat: 12g
- Trans Fat: 1g
- Carbohydrates: 35g
- Fiber: 5g
- Protein: 30g
- Cholesterol: 70mg


Leave a Reply